Java examples are located in the subfolder examples/java.
- Note
- Save the license key file you received for your evaluation program as
${install_dir}/examples/java/LicenseKey.java. When you become a customer you will substitute it with a commercial license key.
Building with Gradle
Each example is an individual Gradle project that can be run standalone. Gradle build scripts have tasks to build and run examples.
Integration with IntelliJ IDEA
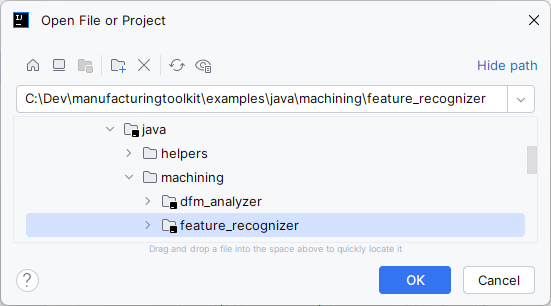
- Open IntelliJ IDEA and select File > Open.
- Choose one of the sample project directories (not the category folder) and click OK.
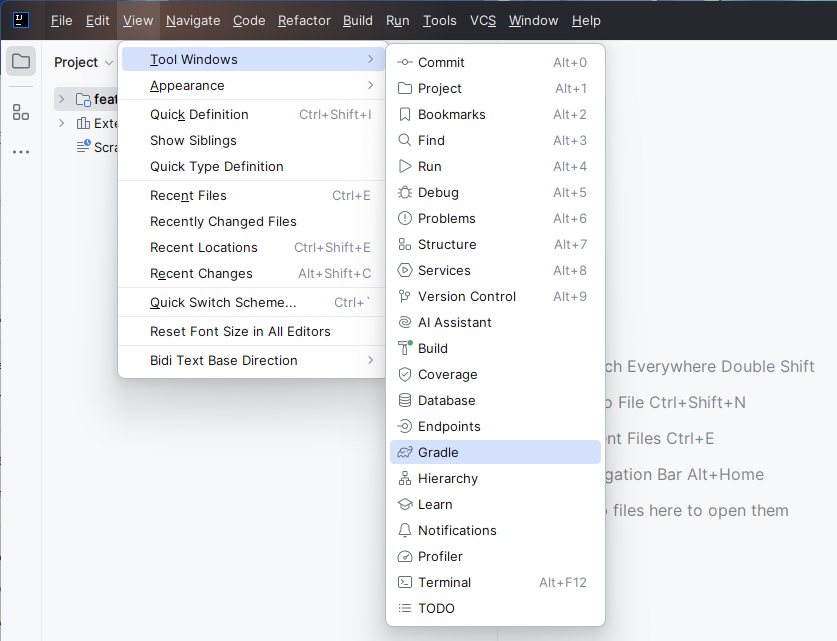
- Open the Gradle view with View > Tool Windows > Gradle.
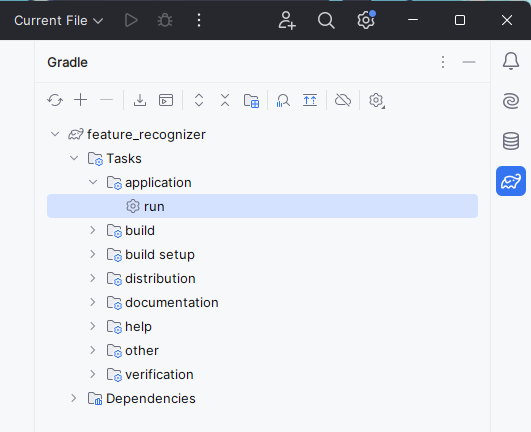
- In the Gradle view, double-click the run task under Tasks > application to run the app.
Integration with Eclipse
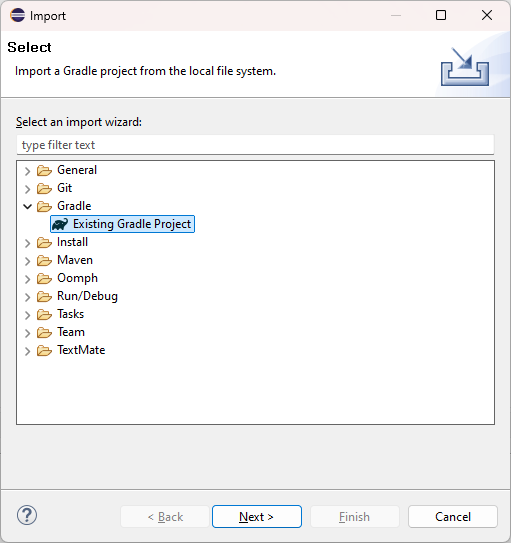
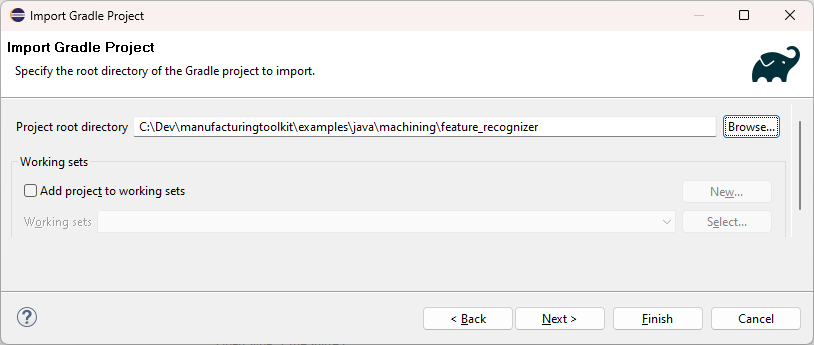
- Open Eclipse and select File > Import.
- In the import wizard, choose Gradle > Existing Gradle Project, then click Next.
- Choose one of the sample project directories (not the category folder) as the project root directory.
- Click Finish to complete the import.
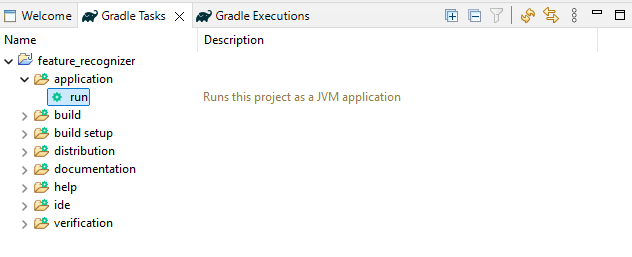
- Open the Gradle Tasks view with Window > Show View > Other > Gradle > Gradle Tasks.
- In the Gradle Tasks view, double-click the run task under {project_name} > application to run the app.
Building from scratch with Eclipse
- Note
- Following instructions are applicable to any supported Operating System.
- Add License key file to the progect.
- Add new class and copy contents of desired MTK example to it.
- Pay attention to class static initializer: System.loadLibrary() calls actually are aligned with a list of required MTK JARs.
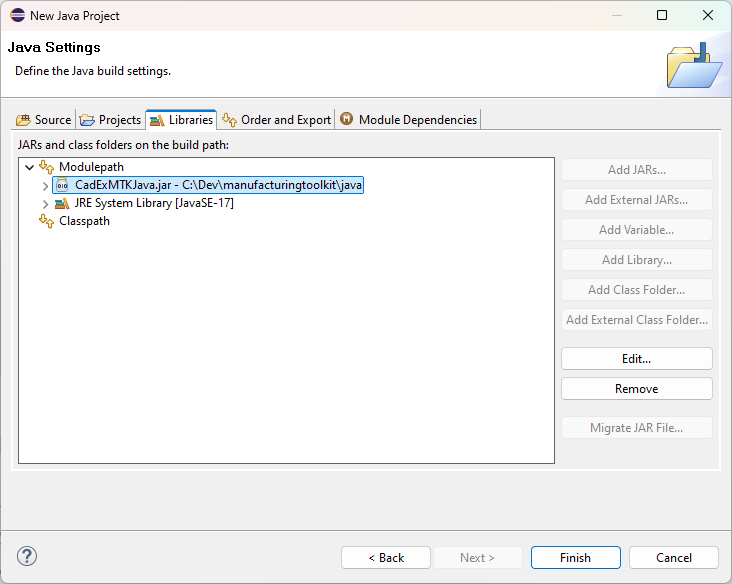
- In the "Project Properties" dialog choose the "Java Build Path" option, go to "Libraries" tab and press "Add External JARs". Navigate to the 'java' subdirectory in Manufacturing Toolkit package (e.g.
C:/Dev/manufacturingtoolkit/java) and select required JARs (e.g. MTKSTEPJava.jar).
Launch configuration
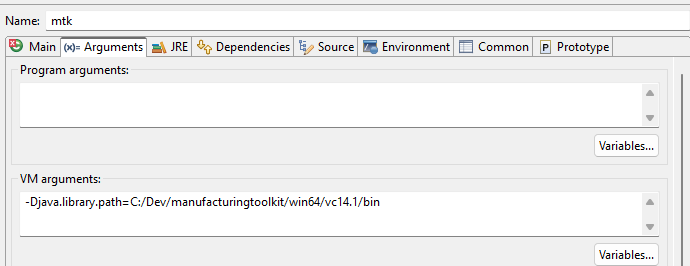
- Open the "Run As" dialog to access launch configuration.
- Select the "Arguments" tab and look for "VM Arguments" window. Add the 'java.library.path' argument with the path to Manufacturing Toolkit native libraries appropriate for your OS. E.g. for Windows:
-Djava.library.path=C:/Dev/manufacturingtoolkit/win64/vc14.2/bin
This is needed to make sure that JVM knows where to load the native libraries from.
- Note
- For Linux or MacOS the path would be like
../manufacturingtoolkit/mac64/clang7/lib.
-
You are free to choose any compiler specific subfolder, but it's recommended to use the one corresponding to latest version (e.g. vc14.2 aka Visual Studio 2019 at the time of this writing).
- Pay attention to "Program arguments" window: some examples require them (e.g. 'transfer' example takes two path arguments).
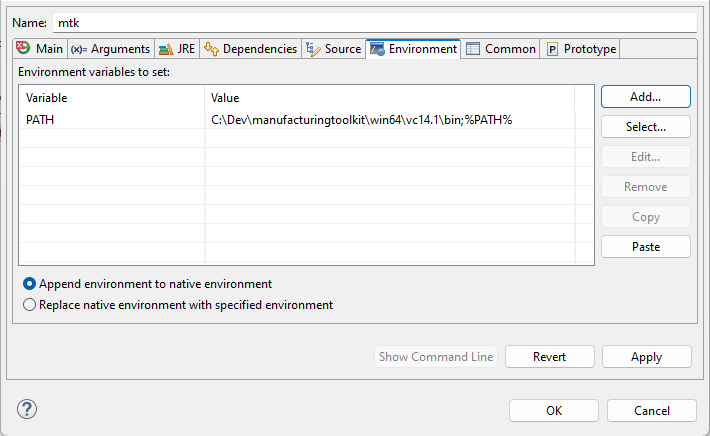
- Navigate to "Environment" tab. Here we need to extend the OS specific libraries environment variable with the same path as in previous step. E.g. for Windows this is a 'PATH' variable:
This step is needed to ensure that the dependencies of native libraries can be located and loaded.
For Linux the variable is LD_LIBRARY_PATH and for MacOS it's DYLD_LIBRARY_PATH.
- You should now be able to run your Java application.
 Manufacturing Toolkit